Budget-Friendly Dollar Tree DIY Home Decor: Crafting Sentimental Wall Art for Just $10
Transforming your living space with personalized touches doesn’t require a substantial budget, as demonstrated in the inspiring video above. You can easily create beautiful and meaningful home decor pieces using affordable supplies, primarily from your local Dollar Tree store. This guide will help you recreate a stunning Dollar Tree DIY wall art project, perfect for displaying cherished memories or adding a unique accent to any room, all for an incredibly low cost of around $10.
Creating custom home decor allows your personality to shine through every corner of your house. Imagine if you could design a beautiful, multi-photo display that tells a story, rather than just hanging individual frames. This project focuses on assembling various Dollar Tree elements into one cohesive and striking piece. Discover how inexpensive frames, wall art, and a little creativity can yield truly impressive results, proving that budget DIY projects can look anything but cheap.
1. Gathering Your Affordable Dollar Tree DIY Supplies
The foundation of any successful DIY project lies in having the right materials on hand. For this particular Dollar Tree DIY home decor masterpiece, you will primarily source your items from the Dollar Tree, ensuring the cost remains exceptionally low. Begin by gathering one 8×10 photo frame, along with five 4×6 photo frames, which form the structural components of your wall art display. Look for Dollar Tree frames that offer a simple design, as these are easy to customize and integrate into your larger vision.
Next, you will need one piece of poster board; this provides a sturdy backing for your entire creation, making it a cohesive unit. Locate a package of copper-colored leaf wall art pieces, which add an elegant, thematic touch to your project. Additionally, you might require some personal embellishments like a 12×12 piece of copper paper or 8.5×11 vanilla card stock, if you wish to create custom mats for your photographs or small art prints. Ensure you have hot glue sticks and a hot glue gun readily available, as these will be essential for assembly.
2. Customizing Your Dollar Tree Frames and Mats
The beauty of this Dollar Tree DIY project lies in its customizability, allowing you to personalize each element. Start by addressing any old photos or prints you intend to use; perhaps you have a cherished, faded photograph that deserves a fresh presentation. In the video, the crafter expertly replaced a worn mat from an old picture frame with a new one crafted from copper paper, transforming its appearance significantly. This simple step elevates the overall look of your sentimental piece.
To create new mats for your 4×6 frames, take your 8.5×11 vanilla card stock and measure it carefully. You will want to cut four pieces precisely to 4×6 inches, providing a clean, neutral background for your smaller decorative elements. If you prefer a different color or texture, consider exploring other card stock options available at craft stores. Imagine if you decided to use a patterned paper instead of vanilla card stock, adding another layer of visual interest to your custom wall art.
3. Preparing Your Decorative Elements for Assembly
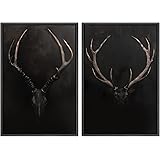
Once your frames and mats are ready, it’s time to prepare the decorative leaf wall art pieces. These copper-colored embellishments will add a touch of sophistication and thematic continuity to your Dollar Tree DIY home decor. Carefully remove the plastic backing from each leaf wall art piece; this step ensures they will adhere smoothly to your prepared surfaces. Some crafters find it helpful to place the leaf pieces onto the vanilla card stock and then trim any excess plastic that might extend beyond the edges, ensuring a clean finish.
Next, you will want to insert your chosen photographs or newly created mats into the 4×6 frames. The crafter in the video decided to use the copper leaf wall art pieces directly inside the 4×6 frames, creating a unified copper-toned aesthetic across the entire project. This approach is excellent for maintaining a consistent theme, especially if you are aiming for a particular color scheme in your home. Imagine if you were creating a display for a child’s room; you might use small illustrations or colorful fabric swatches in place of the copper leaves.
4. Assembling Your Dollar Tree DIY Cross Design
The ingenuity of this Dollar Tree DIY home decor project shines in its assembly, utilizing a simple poster board for structural integrity. Begin by laying out your Dollar Tree frames on the poster board to determine your desired arrangement. The crafter chose a cross-like configuration, placing the 8×10 frame at the top, two 4×6 frames on either side, and two 4×6 frames below, creating a balanced and visually appealing display. This cross shape is both classic and deeply meaningful, especially when showcasing family photographs.
After carefully positioning your frames, use a pen to outline their placement on the poster board. This ensures accurate cutting and alignment, which is crucial for a professional-looking finished piece. Next, cut the poster board to match the outer dimensions of your arranged frames, always cutting slightly inside the lines to ensure it remains hidden behind the frames. This technique provides a robust and seamless backing, transforming individual frames into one unified piece of art that can be easily mounted on a wall. Imagine if you wanted a different arrangement; a vertical column or a rectangular grid would also work beautifully, using the same poster board backing method.
5. Securing and Finishing Your Unique Wall Art
With the poster board cut to size, you are ready for the final assembly steps, securing all components into your stunning Dollar Tree DIY wall art. Carefully apply hot glue to the back edges of each frame and firmly press them onto the corresponding outlines on your cut poster board. Work one frame at a time, holding each in place for a few moments to allow the glue to set properly. This ensures a strong bond, preventing any frames from detaching later.
The video also demonstrates a clever method for creating a simple wall hanger: bend a small piece of the excess poster board into a loop or tab. Glue this securely to the back of your finished piece, ensuring it’s strong enough to hold the entire display. Allow ample time for all the hot glue to dry completely before attempting to hang your masterpiece. The crafter emphasized allowing the glue to dry thoroughly, as rushing this step could compromise the integrity of the piece. Imagine if you had a particularly heavy frame; you might opt for two hangers for extra security.
This completed Dollar Tree DIY home decor project is not only incredibly affordable but also deeply personal. It transforms inexpensive Dollar Tree finds into a treasured family heirloom or a stylish decorative accent, proving that beauty and sentiment do not need to come with a hefty price tag. You can proudly display this personalized wall art, which captures special memories and adds warmth to your home, all for the fantastic budget of around $10.
Your $8 Dollar Tree Home Decor DIY Questions
What kind of DIY project is this?
This project helps you create personalized wall art, specifically a multi-picture frame display, using affordable items. It’s a way to add unique decor to your home without spending a lot of money.
Where should I buy the materials for this project?
You should primarily purchase your supplies from a Dollar Tree store. This ensures the project remains very budget-friendly.
How much does it cost to make this home decor piece?
The entire project is incredibly affordable, costing around $10 for all the necessary supplies.
What are the main supplies I’ll need from Dollar Tree?
You will need one 8×10 photo frame, five 4×6 photo frames, one piece of poster board, copper-colored leaf wall art pieces, and hot glue sticks with a hot glue gun.
Can I personalize this wall art display?
Yes, this project is highly customizable. You can choose your own photos, use different colored card stock for mats, or even vary the arrangement of the frames to suit your style.