Unlocking Budget Elegance: Transform Your Home with Dollar Tree DIY Decor
For many homeowners and renters, the dream of a beautifully styled living space often clashes with the reality of a tight budget. High-end home decor can be prohibitively expensive, leading to a common dilemma: sacrifice style or stretch your finances. However, an exciting alternative exists that marries creativity with frugality, allowing you to craft stunning accents without breaking the bank. This approach leverages the humble Dollar Tree, transforming inexpensive finds into bespoke pieces that reflect your personal aesthetic.
If you’ve just watched the inspiring video above, you’ve seen firsthand how everyday items can be reimagined into elegant decor. This article dives deeper into the art of Dollar Tree DIY home decor, expanding on the techniques and ideas presented in the video to help you elevate your crafting game and truly personalize your space on a budget. We’ll explore the ‘why’ behind certain crafting choices, offer additional insights, and provide a roadmap for maximizing your Dollar Tree finds for maximum impact.
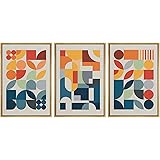
Crafting Cohesive Style: The Three-Piece Wall Art Ensemble
The video kicks off with an ingenious method for creating a sophisticated three-piece wall decoration using common Dollar Tree frames. Instead of seeing these 5×7 frames as mere picture holders, the project reconfigures them into an interlocking geometric display, a testament to resourceful design.
Deconstructing the Design: From Frames to Focal Points
The core of this project lies in the simple yet effective manipulation of standard Dollar Tree frames. By carefully separating the long and short sides, two 5×7 frames yield the necessary components to construct both a small and a large square. The precision of this transformation highlights the potential for structural repurposing. Hot glue, a crafting staple, then securely binds these reclaimed elements into their new square forms.
What truly elevates this wall art is the thoughtful addition of metallic and reflective elements. The narrator expertly integrates an Aleene’s Metal Glue for precision bonding, particularly when attaching unexpected elements like a golf ball. This subtle nod to industrial chic, combined with the reflective sheen of mirrors, creates a striking contrast. A 2-inch mirror is nestled into a Dollar Tree canning lid, while a 5-inch mirror fits snugly into the smaller frame, enhancing the overall visual depth. Rust-Oleum Metallic Gold spray paint provides a uniform, high-end finish, unifying disparate materials into a cohesive piece. The suggestion to expose six inches of a skewer for hanging ensures the piece stands slightly off the wall, adding another layer of dimension.
Beyond the Basics: Design Principles and Alternatives
While the video demonstrates a specific design, the principles are broadly applicable. Consider experimenting with different frame sizes for varied proportions, or incorporating other small, spherical objects if golf balls aren’t your aesthetic. The use of a canning lid as a decorative cover for the wall hook is a clever detail, highlighting how even functional elements can contribute to the overall design. This project demonstrates how a few dollars and a keen eye for geometry can result in wall art that looks anything but budget-friendly.
Creating Celestial Charm: The Decorative Foam Globe
The second Dollar Tree DIY project introduces a method for crafting a captivating decorative globe, perfect for adding a touch of whimsy and elegance to any surface. This project artfully reuses leftover balloon sticks, showcasing an excellent example of upcycling.
Assembling the Sphere: Precision and Patience
The foundation of this globe is a 2.5 to 3-inch foam ball, which serves as the armature for dozens of precisely cut balloon stick segments. The narrator advises cutting these sticks to 1 ¾ inches, a detail crucial for achieving the curved, spherical shape. Using a hot glue gun on a low-temperature setting is a key tip; it allows for better control and minimizes the risk of melting the foam, ensuring cleaner adhesion and a more stable structure.
The process involves piercing the foam and then carefully inserting the glue-tipped sticks, working outward from a central point to create an even, geodesic pattern. When you reach the end, some trimming of the stick segments may be necessary to fit the diminishing foam surface, demonstrating the need for adaptability in crafting. Once the structural elements are in place, the narrator removes temporary parts to apply tacky glue and glitter, an essential step for covering the foam and adding sparkle before the final spray painting. Rust-Oleum Gold spray paint unifies the piece, giving it a sophisticated metallic finish.
Elevating the Details: Gems and a Polished Base
The addition of Michael’s gems in the center of the “flower-like” arrangements adds a touch of intricate detail, contrasting with the gold. These rhinestones are affixed with a dab of metal glue, showcasing that even tiny details can dramatically impact the perceived value of a DIY item.
For the base, a Dollar Tree wooden base is prepped with paint—acting as a primer—before being drilled with a bit large enough to accommodate the balloon stick. This priming step is vital, as raw wood often absorbs spray paint unevenly, leading to a patchy finish. White Rust-Oleum Gloss paint then gives the base a clean, polished look. Strong adhesive combined with hot glue ensures the globe is securely and straightly mounted, proving that a solid foundation is just as important as the decorative elements. This project serves as a brilliant example of how structural integrity and careful finishing touches combine to create an impressive piece of decor.
Tropical Twist: The Embellished Pineapple Vase
The third DIY project pivots to creating a uniquely textured pineapple vase, a vibrant and stylish accent piece that starts with an unexpected Dollar Tree item: pineapple plates. This project truly exemplifies creative vision, transforming disposable goods into durable decor.
From Plate to Planter: Form and Function
The base of this innovative vase begins with two Dollar Tree pineapple plates, which are joined together with a foam disc placed directly in the center, secured with low-temperature hot glue. The emphasis on low temperature is practical, as it allows the glue to dry faster and avoids warping the delicate plate material. Ensuring the plates are evenly aligned and can stand upright is crucial for the vase’s stability.
After cleaning the surface with alcohol, the entire assembly is spray-painted with Rust-Oleum Metallic Gold, providing a luxurious, uniform finish. A critical insight shared in the video is the importance of gluing silicone mold pieces *before* spray painting the entire vase. This ensures seamless integration and prevents the need for tricky touch-ups later, a valuable lesson in optimizing your crafting workflow. The narrator uses two hot glue guns simultaneously to fill the silicone mold, minimizing bubbles and dents in the resulting decorative pieces—a clever hack for achieving smoother castings.
Adding Sparkle and Structure: Rhinestones and Chain
Once the molded pieces are painted (or ideally, glued and then painted with the vase), they are adhered using strong adhesive. The narrator uses a paint marker to highlight the pineapple’s natural lines, adding definition and visual interest. Rhinestones, sourced from Michael’s or Hobby Lobby, are then strategically placed around the top and filled in with hot glue, adding a significant sparkle and perceived value. Another set of rhinestone chains is used to cover up any gaps or seams, a perfect example of problem-solving through embellishment. The use of electrical tape to hold pieces firmly in place while adhesive dries is another practical tip that ensures a robust final product. This project beautifully illustrates how a combination of structural integrity, careful embellishment, and strategic finishing creates a high-impact decorative piece.
Organic Artistry: The Textured Poster Board Vase
The final DIY project delves into creating a uniquely textured vase or container using poster board and old containers, demonstrating an organic, sculptural approach to Dollar Tree DIY home decor. While the narrator notes this project didn’t entirely match their initial vision for the container, the vase version shows immense promise, proving that sometimes, happy accidents lead to beautiful results.
Pliability and Texture: The Glue Soak Method
The foundation of this project is the transformation of ordinary Dollar Tree poster board into a pliable, moldable material. Geometric shapes are cut from the poster board, then soaked in a mixture of one part water to two parts school glue for 20 to 25 minutes. This soaking process is crucial for increasing the poster board’s pliability, allowing it to conform to curved surfaces without creasing or tearing.
The soaked pieces are then carefully placed onto an old container or Dollar Tree vase, creating an overlapping, organic texture. For the larger container, excess glue is cleaned every 15 minutes for the first half an hour as it dries, which prevents unsightly drips and ensures a clean finish. The project’s success hinges on drying the pieces upside down to maintain their form. The narrator finds the vase version more successful due to avoiding overlap, resulting in a cleaner, more defined texture.
Natural Embellishments and Finishing Touches
After drying, the textured surface is painted with white acrylic paint, providing a crisp, uniform base. The narrator then adds sticks gathered from outside, painted gold, to decorate the vase. This natural element introduces an organic contrast to the crafted texture, showcasing the versatility of incorporating found objects. This project, particularly the vase iteration, highlights how simple, inexpensive materials can be manipulated to create unique textures and forms, ultimately contributing to a personalized home aesthetic. It serves as a reminder that experimentation and adaptation are key aspects of successful DIY.
Embracing Dollar Tree DIY home decor not only offers a cost-effective way to beautify your surroundings but also provides a creative outlet for personal expression. Each project, from the geometric wall art to the textured vase, exemplifies the potential for transforming everyday items into extraordinary accents. Dive into these affordable crafts and discover the satisfaction of creating something truly unique for your home.